React ToDo App
Creating a small React application to manage a To-Do list is an excellent way to understand the basics of React and how to work with external APIs. In this tutorial, we'll use mock APIs from Beeceptor for listing and creating todo-tasks. Beeceptor is an easiest way to get sample APIs for faster prototyping. Below is a step-by-step guide to build this application.
To follow this tutorial,
- You should have basic knowledge of JavaScript, HTML, and CSS.
- Ensure you have Node.js and npm (Node Package Manager) installed on your computer.
1. Setting Up the Project
First, you need to set up your React project. If you haven't already, install Node.js from nodejs.org. Then, create a new React project by running:
npx create-react-app todo-app
cd todo-app
2. Install Dependencies
You might need Axios for making API requests. Install it by running:
npm install axios
To enhance the aesthetics and user experience of your React To-Do application using Bootstrap CSS, install the Bootstrap package in your project.
npm install bootstrap
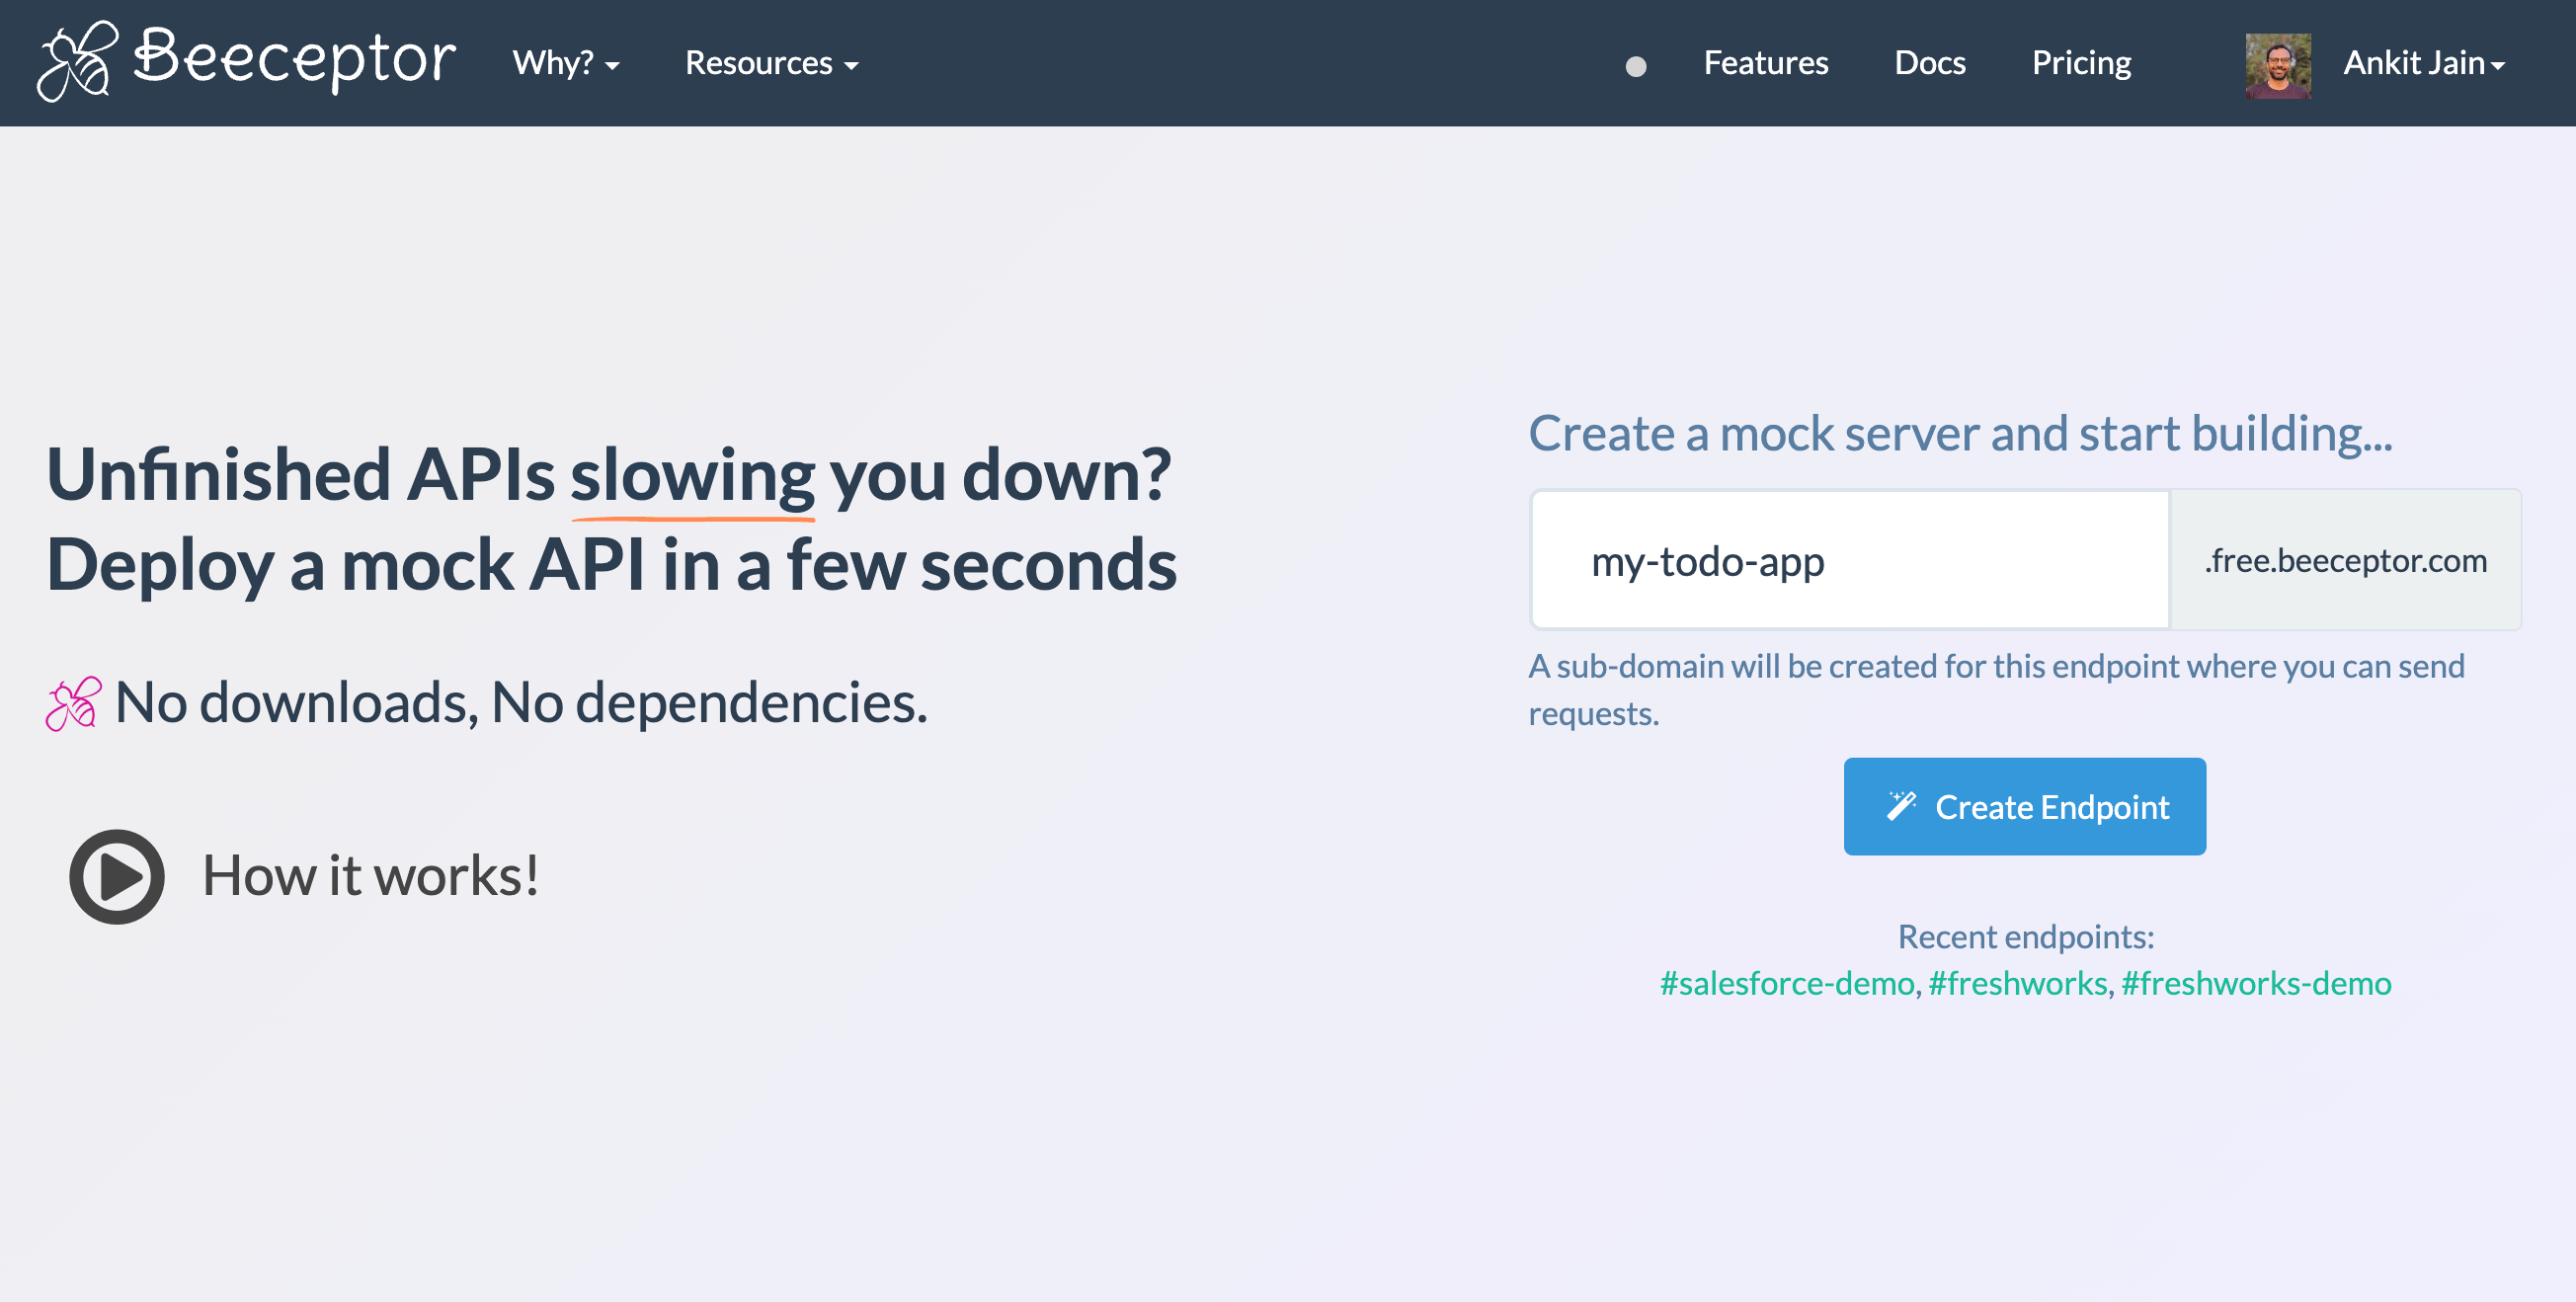
3. Setting Up Beeceptor
Go to Beeceptor and create a new endpoint for your mock API. You will need two endpoints: one for listing tasks and another for creating a task. For example, consider we've set up a new endpoint called 'my-todo-app'.
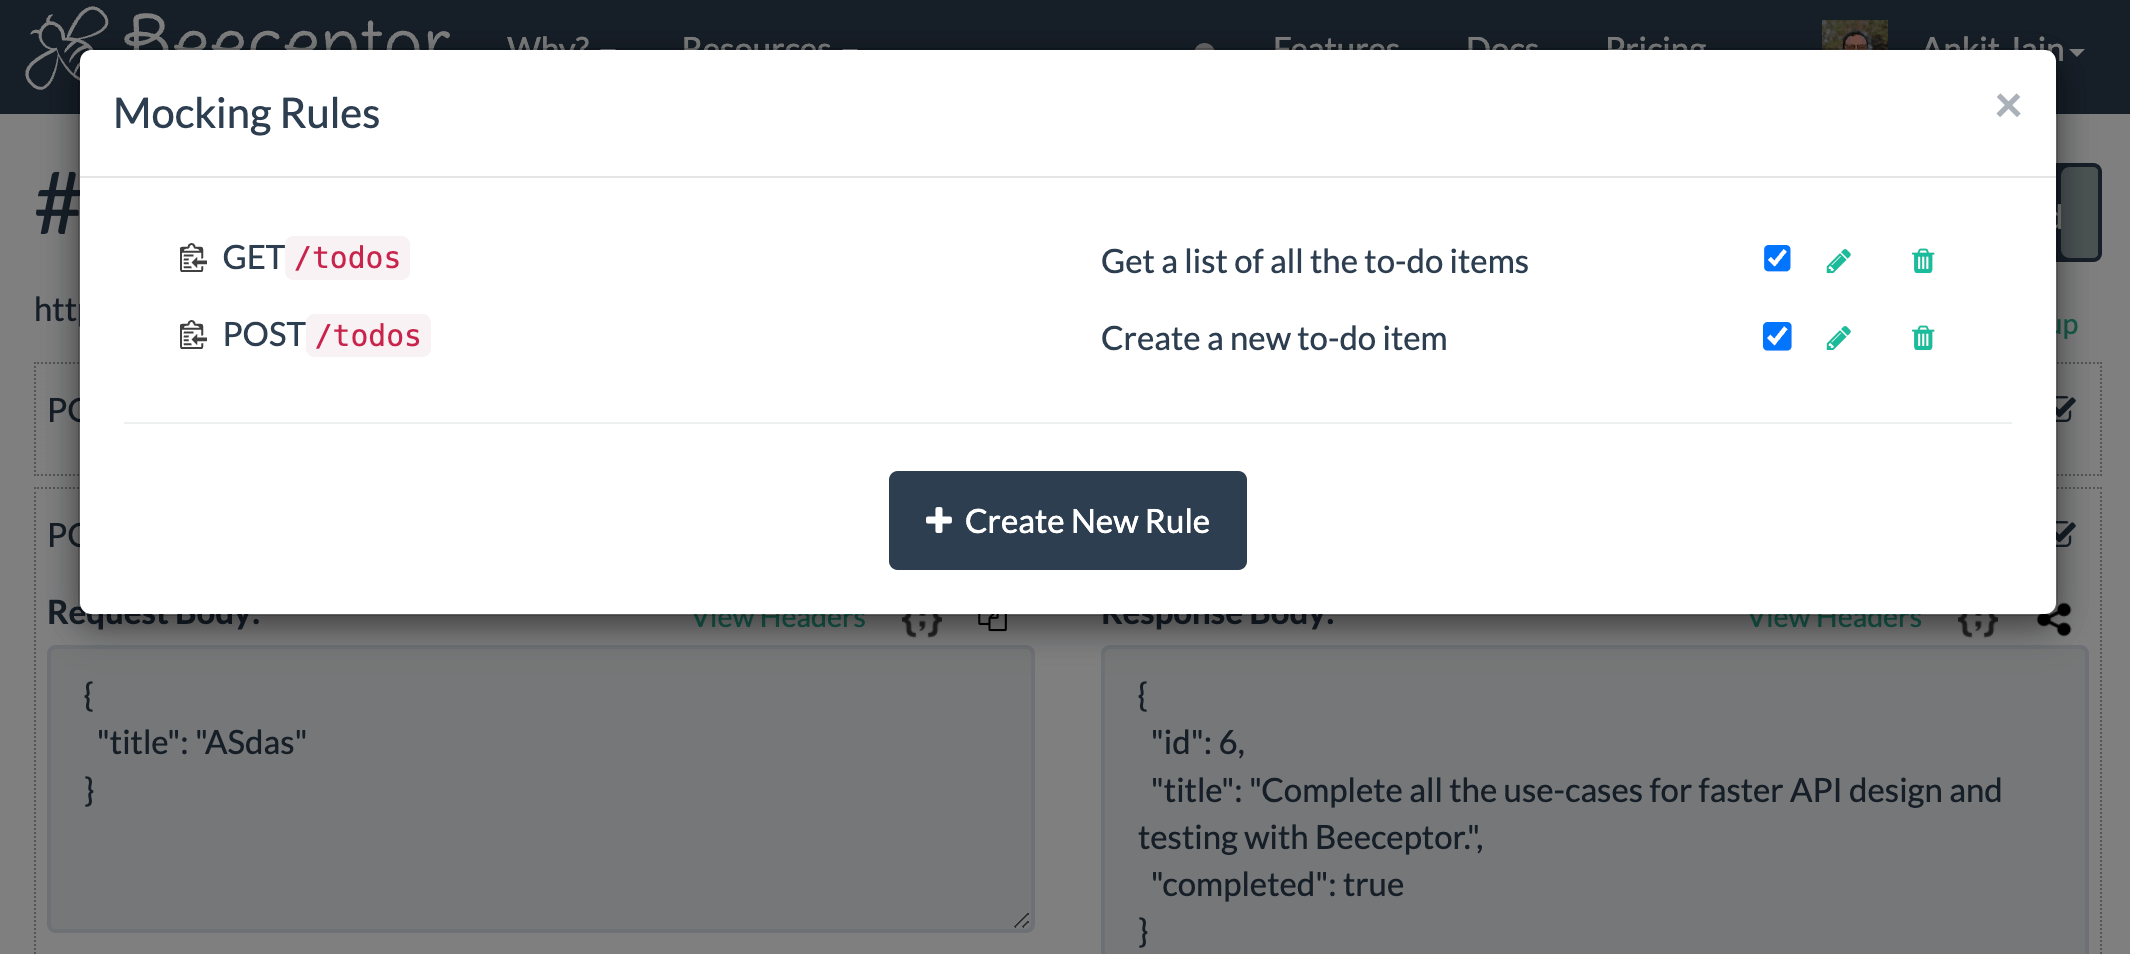
In this setup, Beeceptor has provided two pre-configured sample APIs: one is a GET request for retrieving all the todo tasks, and the other is a POST request to create a new task.
https://my-todo-app.free.beeceptor.com/todosfor listing tasks.https://my-todo-app.free.beeceptor.com/todosfor creating a task.
You can configure your mock responses further. For listing tasks, the mock API is returning an array of tasks, each with id and title field.
4. Building the React Application
Your application will have mainly two components. These components will be invoking the mock APIs provided by Beeceptor.
- TaskList for displaying tasks.
- CreateTask for creating a new task.
TaskList Component
This component will fetch and display tasks. Create a file src/TaskList.js and paste the following:
import React, { useEffect, useState } from 'react';
import axios from 'axios';

const TaskList = () => {
    const [tasks, setTasks] = useState([]);

    useEffect(() => {
        axios.get('https://my-todo-app.free.beeceptor.com/todos')
            .then(response => {
                setTasks(response.data);
            })
            .catch(error => {
                console.error("Error fetching data: ", error);
            })
    }, []);

    return (
        <div>
            <h2 className="mb-3">Tasks</h2>
            <ul className="list-group">
                {tasks.map(task => (
                    <li className="list-group-item" key={task.id}>{task.title}</li>
                ))}
            </ul>
        </div>
    );
};

export default TaskList;
CreateTask Component
This component will fetch and display tasks. Create a file src/CreateTask.js and paste the following:
import React, { useState } from 'react';
import axios from 'axios';

const CreateTask = () => {
    const [title, setTitle] = useState('');

    const handleSubmit = (e) => {
        e.preventDefault();
        axios.post('https://my-todo-app.free.beeceptor.com/todos', { title })
            .then(response => {
                console.log(response.data);
                setTitle('');
            })
            .catch(error => {
                console.error("Error adding task: ", error);
            });
    };

    return (
        <div>
            <h2 className="mb-3">Create Task</h2>
            <form onSubmit={handleSubmit} className="mb-3">
                <input
                    type="text"
                    className="form-control mb-2"
                    value={title}
                    onChange={e => setTitle(e.target.value)}
                    placeholder="Enter task"
                />
                <button type="submit" className="btn btn-primary">Add Task</button>
            </form>
        </div>
    );
};

export default CreateTask;
5. Integrating Components in App.js
Now, integrate these components into your main App.js.
import React from 'react';
import TaskList from './TaskList';
import CreateTask from './CreateTask';
import 'bootstrap/dist/css/bootstrap.min.css';

const App = () => {
    return (
      <div className="container mt-5">
          <h1 className="text-center mb-4">Todo App</h1>
          <CreateTask />
          <TaskList />
      </div>
    );
};

export default App;
6. Running the Application
Kick off your application by running the specified command below. Once it's up and running, you'll notice that it displays five tasks. These are actually being pulled from the Beeceptor mock API.
npm start

7. Testing
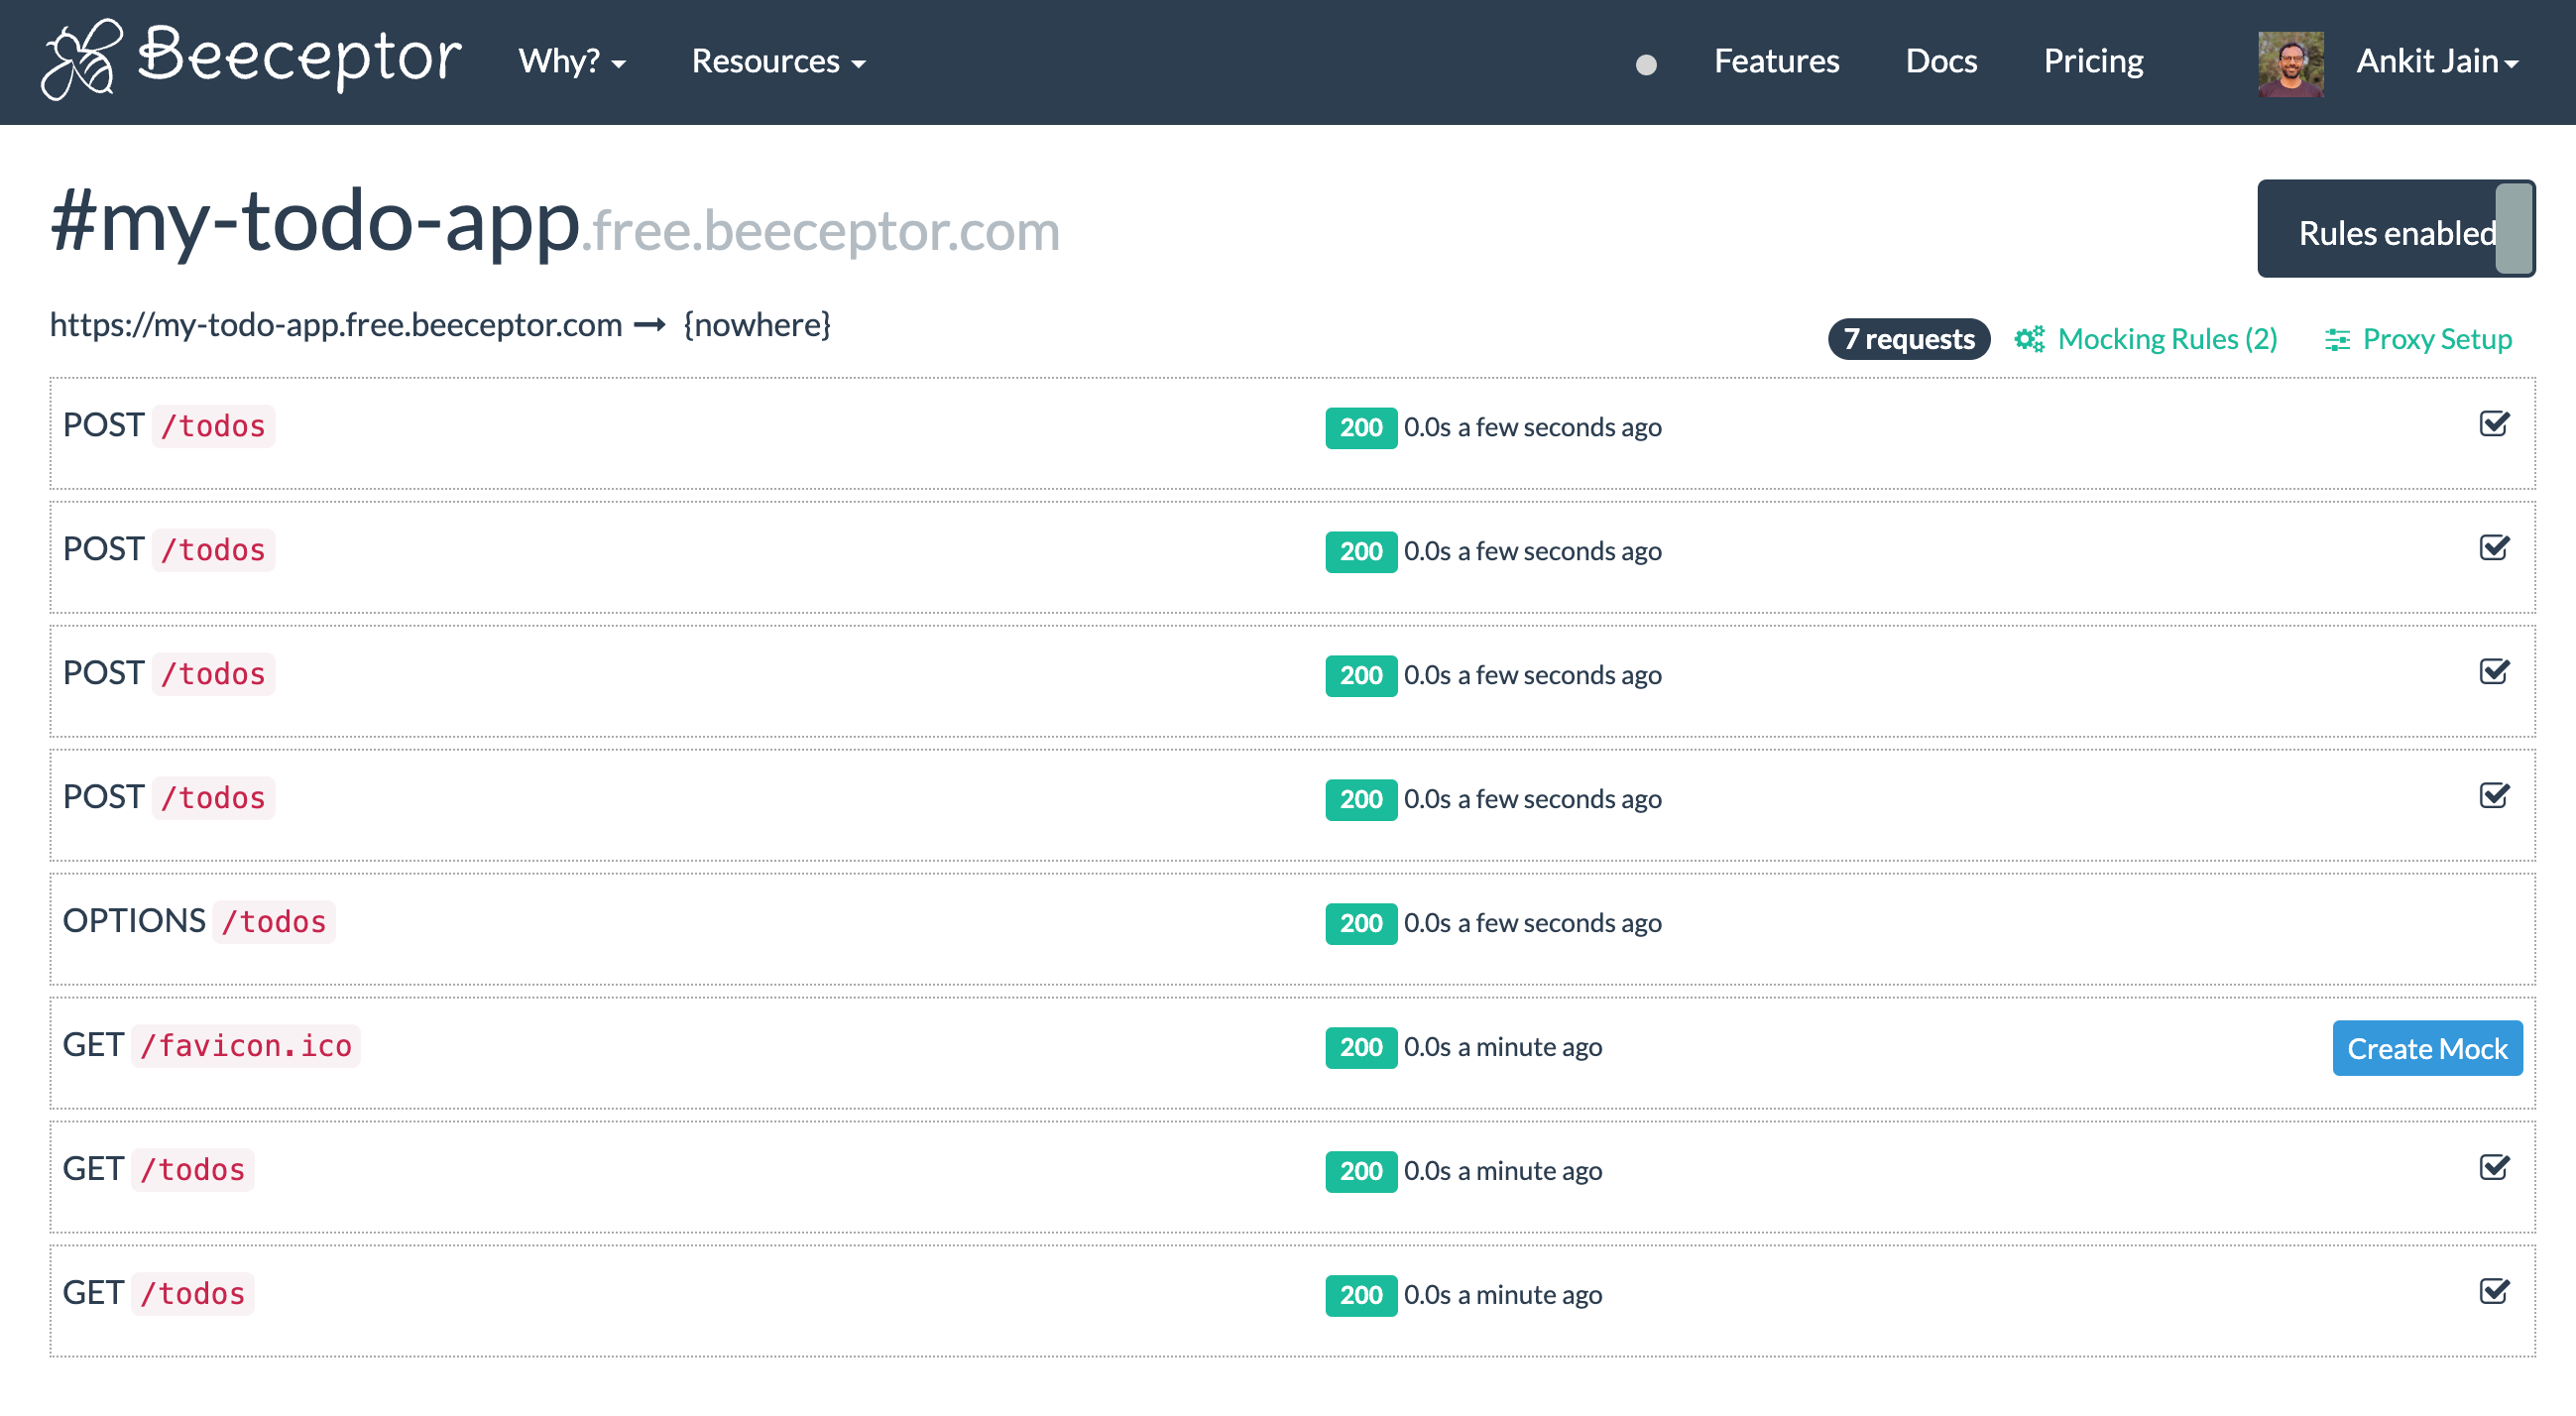
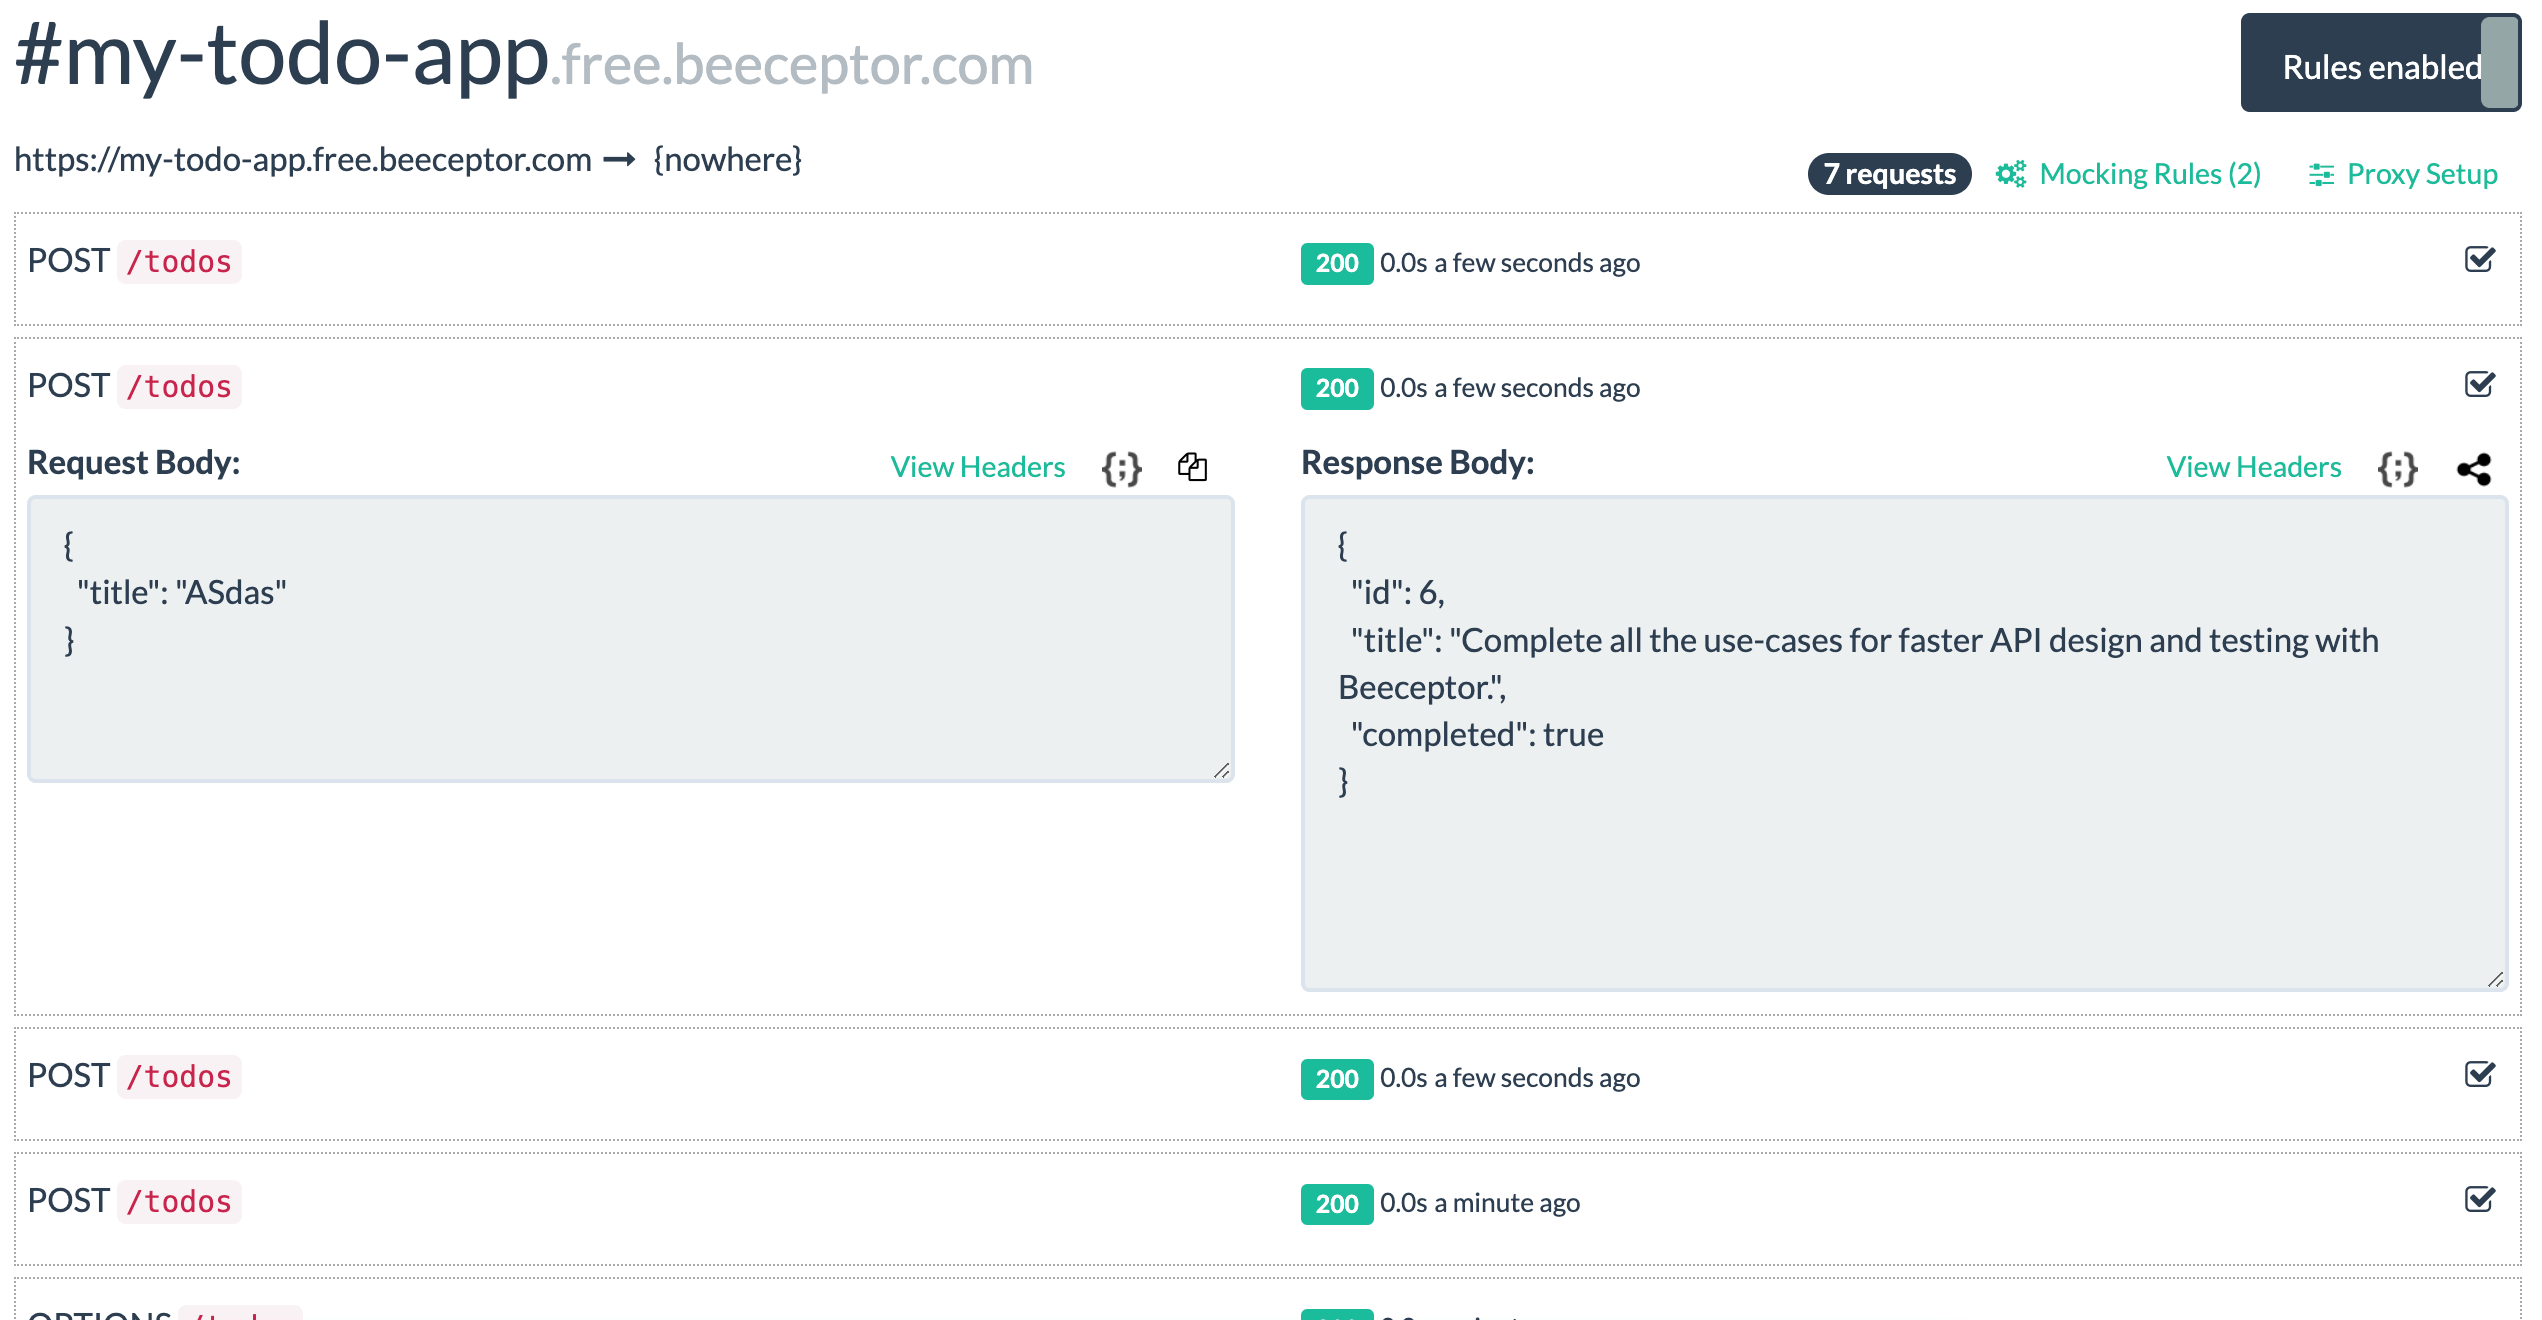
To test your application, try adding tasks and then verify that the XHR request is being made. Keep in mind that since these are mock APIs, the tasks you add won't stick around after you reload the page. But the cool part is, you can still track the requests going to Beeceptor. This lets you check out details like the request payload, the response code, and more. Plus, you have the option to simulate what happens when a big list of tasks is returned.
8. Conclusion
The use of mock APIs, like Beeceptor in this React To-Do application, offers a wide range of possibilities for both development and learning. Here are some actions you can explore further:
- Learning Aspects: Using mock APIs provides a safe environment to experiment with and understand various aspects of API integration, data handling, and React components.
- Testing Authentication: Simulate user login and registration processes. This allows you to learn how to handle user credentials, sessions, and security aspects without needing a backend.
- Testing Different HTTP Methods: Experiment with GET, POST, PUT, DELETE, and PATCH requests. This helps in understanding how different methods are used in real-world applications for creating, reading, updating, and deleting data.
- Pagination and Load More Features: Implement functionality to handle large datasets efficiently. This is crucial for improving user experience and app performance in data-rich applications.
- Simulating Failures: Configure mock APIs to mimic server errors or network failures. This is essential for testing your application's resilience and error handling capabilities.