Local Tunneling
Local Tunneling is a great way to bind a web service running on your localhost to a public endpoint. This is mainly useful when you want to expose the service running on your development machine to a dependent team member (like UI developers). In addition, this is quite helpful when you are developing a callback or a webhook to receive notifications from external services.
Tunneling with Beeceptor
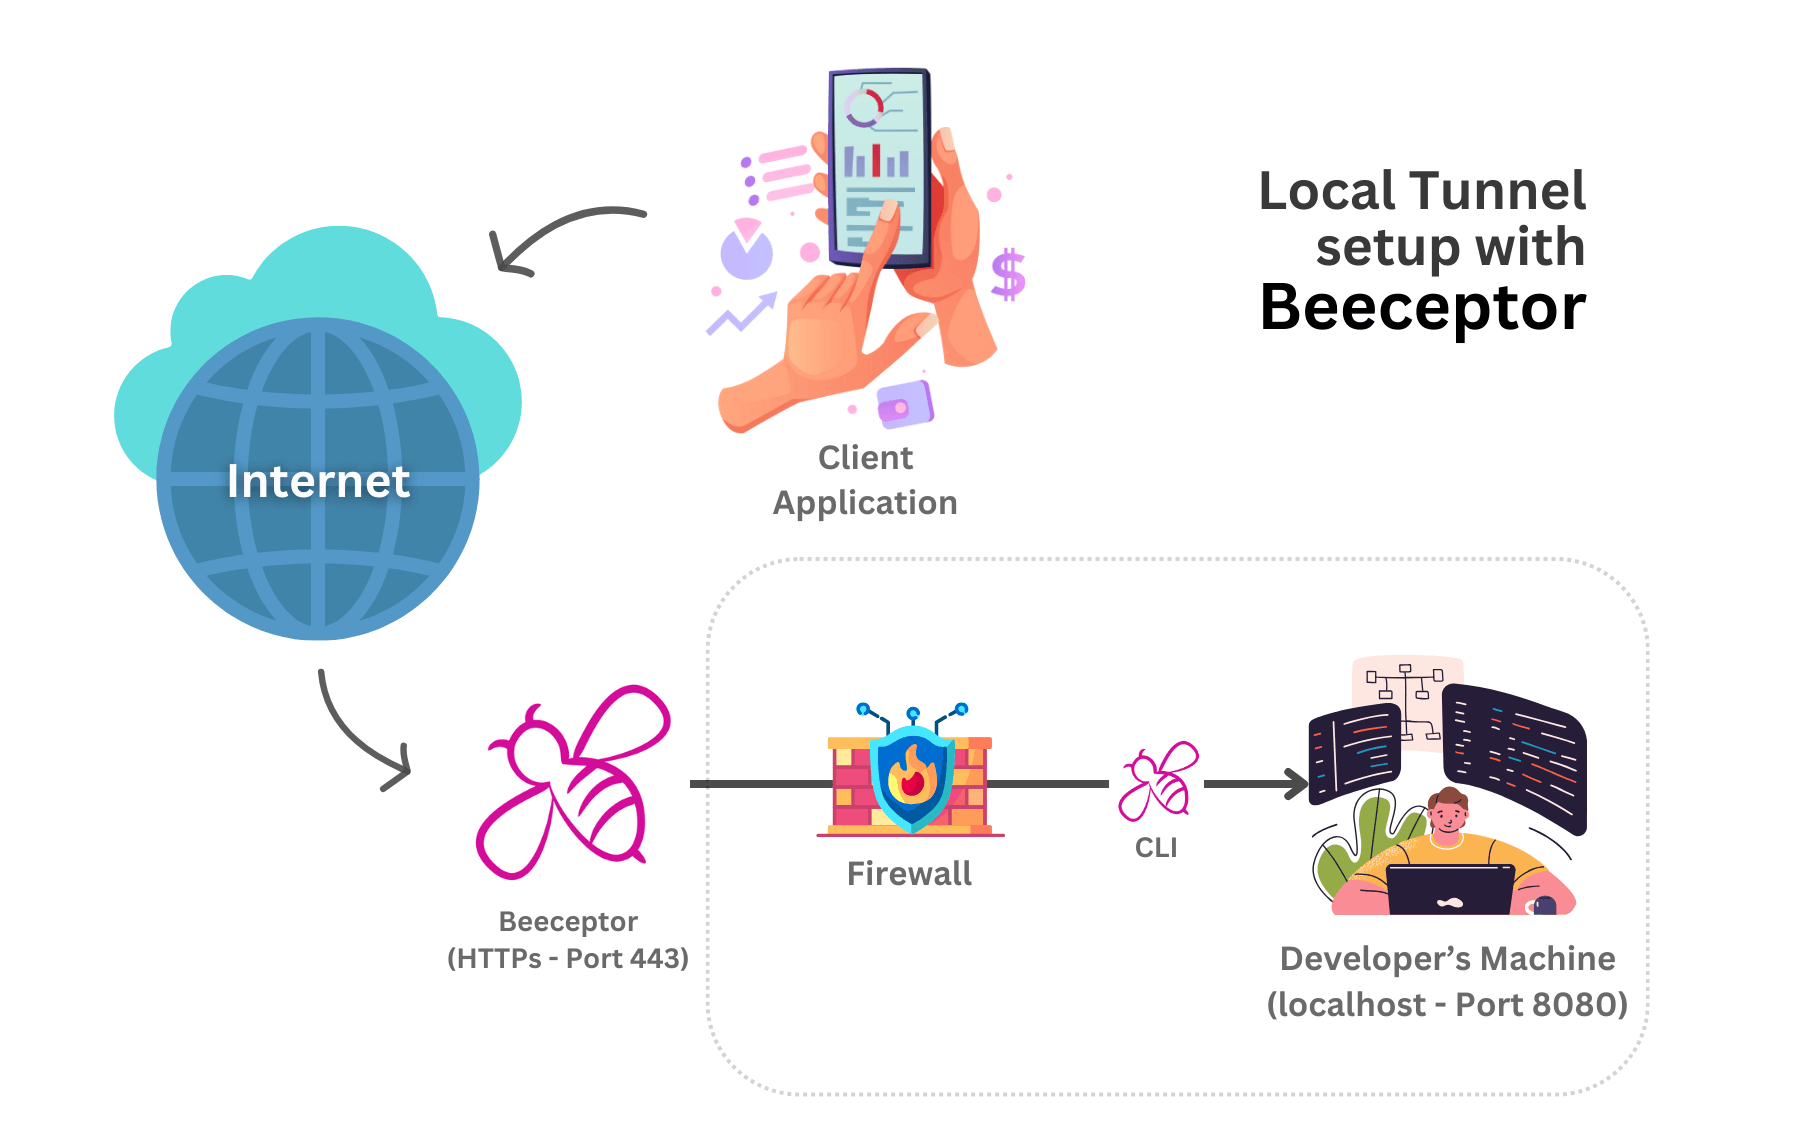
Beeceptor enables this use-case by giving you a public URL on the Internet. All the requests hitting the Beeceptor endpoint will be routed to the local machine's port, and the response will be served back to the caller.
All of the requests and responses are visible on the endpoint dashboard as usual. Any request that gets matched up with a mocking rule will get a mocked response (i.e., it won't go through tunneling). The Beeceptor CLI is an easy-to-install developer tool that helps you connect your localhost port with Beeceptor's endpoint. It works on all platforms (macOS, Windows, Linux). You can install it using NPM or download it as an independent executable file.
Step 1: Enable tunneling
If you are on a Free plan, this step is not required. For convenience, Beeceptor CLI manages this for you.
Open the endpoint dashboard and enable tunneling for the endpoint.
Step 2: Installation
The Beeceptor CLI is a developer tool to help you connect the localhost port with Beeceptor's public endpoint. It is easy to install, and works on all platforms (macOS, Windows, and Linux). The Beeceptor CLI can be installed using NPM or downloaded as an independent executable file.
Option 1: Install via NPM (Node package manager)
You can install Beeceptor CLI using Node's package manager. It is published on NPM as beeceptor-cli. If you have NPM/NodeJs installed, copy and run the following command:
npm i beeceptor-cli -g
or
yarn global add beeceptor-cli
Refer to npmjs.com/package/beeceptor-cli for more details.
Option 2: Download standalone executable
You can download the Beeceptor CLI by clicking on the following links. Ensure that you pick the right platform.
Download Links
Decompress
The downloaded file is a tar.gz file. You can decompress it using the following command:
tar -xvf <path-to-tar-file.tag.gz>
Step 3: Run the Beeceptor CLI
If you have installed via NPM simply type the following to get started:
beeceptor-cli -p port-number
Note: You may be asked to update the CLI if it is an obsolete version.
Run from downloaded binaries
Run the CLI using following command. Here you pass the localhost port using -p parameter.
Windows: Open Power Shell or Command Prompt to run the following:
beeceptor-cli-windows -p port-number
Mac: Open Terminal app and run the following:
./beeceptor-cli-macos -p port-number
Linux: Open bash or shell and run the following:
./beeceptor-cli-linux -p port-number
Step 4: Pick an endpoint
Create a new free endpoint
When you pick this, the CLI will assign you a unique endpoint that will route all requests to your localhost at specified port.

Note: This option follows the Free plan's limits (50 requests/day). If you need more requests, consider upgrading and authorize the upgraded endpoint.
Authorize an existing endpoint
After installing the Beeceptor CLI, you must connect it with your Beeceptor endpoint. To do so, run the following command in the terminal with -p option and specify a port number on localhost.
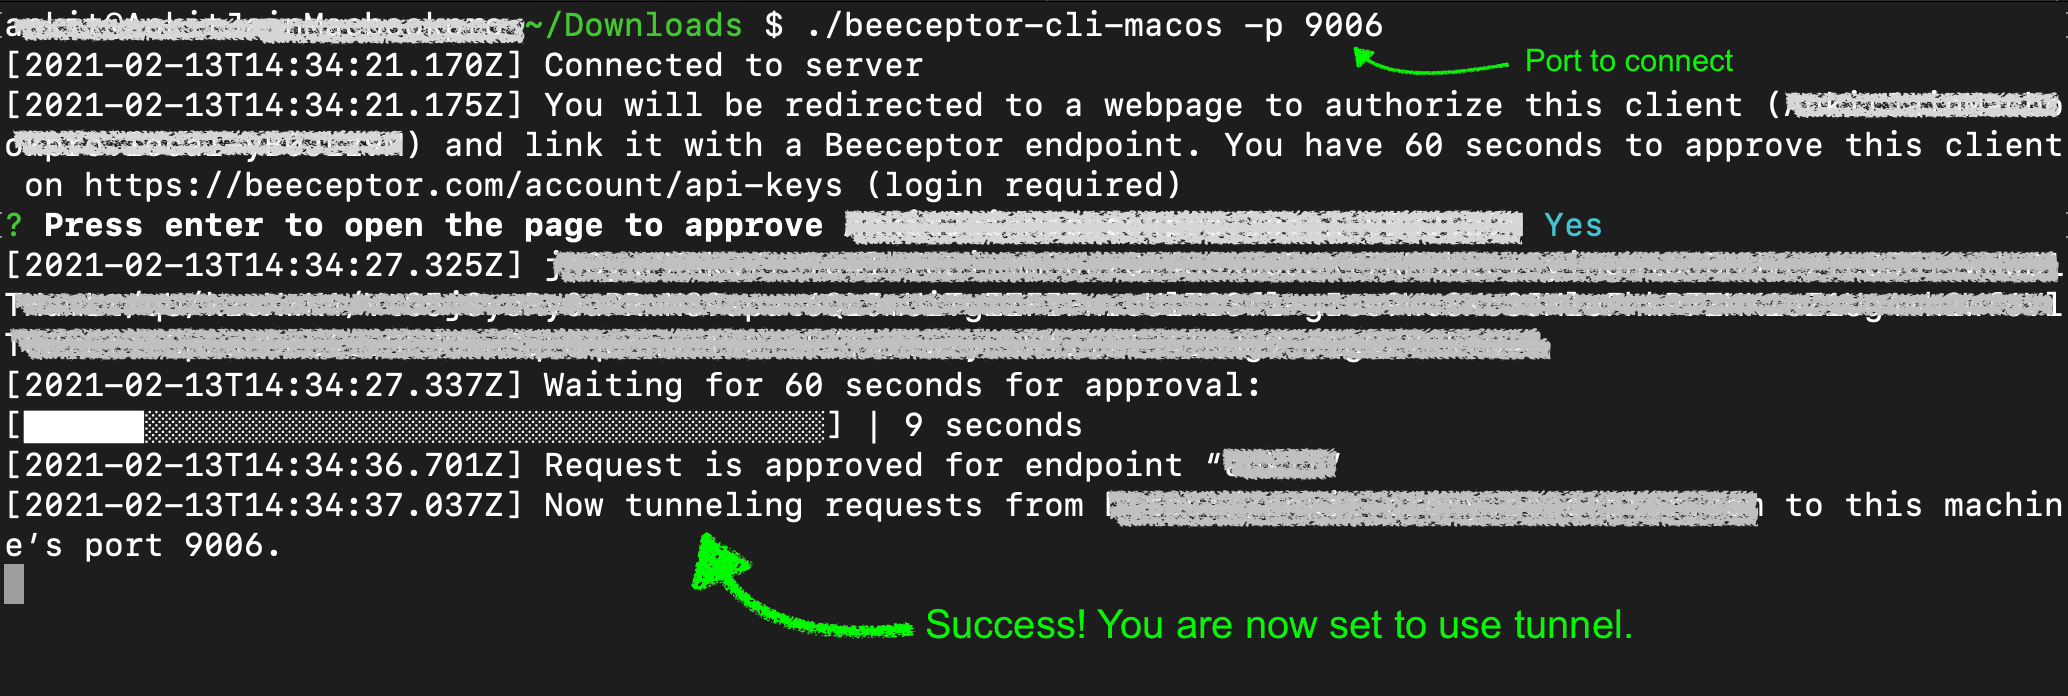
Next, you are required to authorize. You’ll be prompted to launch your web-browser. Once logged in, you can grant or link a Beeceptor endpoint with this client-machine's authentication request. When you see a message "Now tunneling requests from... to this machine's port xxxx.", you are all set to receive requests from Internet to your local machine.
Example command to run: ./beeceptor-cli-macos -p 9006
Step 5: Ready to receive requests
You are all set! Any request sent to your Beeceptor's endpoint will now be routed to this port on localhost. The response served by the local service, will be sent back to the caller.
CLI Parameters
| CLI Parameter | Description |
|---|---|
-h | Specifies the hostname or IP address of the local server to establish a connection. The default value is 127.0.0.1. |
-p | Required. Specifies the port number on the local server where the connection will be established. |
--https | Enables the use of HTTPS for the connection to the specified host and port. By default, the connection uses HTTP. |
--headless | Prints the authentication token URL to the shell, rather than opening it in a web browser. |
Key considerations
-
Timeout Handling: The service running on the local port must respond within 60 seconds. Failure to respond within this timeframe results in a timeout, leading to an error response.
-
Mocking Rule Priority: Mocking rules take precedence over local tunneling. If an incoming request matches a predefined mocking rule, it is processed accordingly, and does not proceed to the local service. This feature is useful for selectively mocking specific requests while handling others locally.
-
Connection Errors: If the local service is inaccessible, you may encounter errors indicating a failure to connect, such as
Failed to connect to host (refused). -
Concurrency and Rate Limiting: The system permits a maximum of 8 simultaneous requests for tunneling. Exceeding this cap triggers rate limiting with an error response as
429 - Too many requests. -
Protocol Specification: By default, the Beeceptor Command Line Interface (CLI) establishes connections using the HTTP protocol. To force HTTPS, include the
--httpsoption when executing the CLI command. -
Headless Mode: If you're using Beeceptor CLI on a server that doesn't have a user interface or web browser, use the
--headlessoption. This approach prints the authentication token URL in the shell. You can copy this URL and open it on a device with web access to complete the authentication process.
macOS Warning
If you're using the Beeceptor CLI on macOS, you might run into macOS security blocks that prevent the app from running. macOS uses a security feature called Gatekeeper to block applications that haven't been notarized by Apple. When you first try to launch the Beeceptor CLI, you might see a message like this:
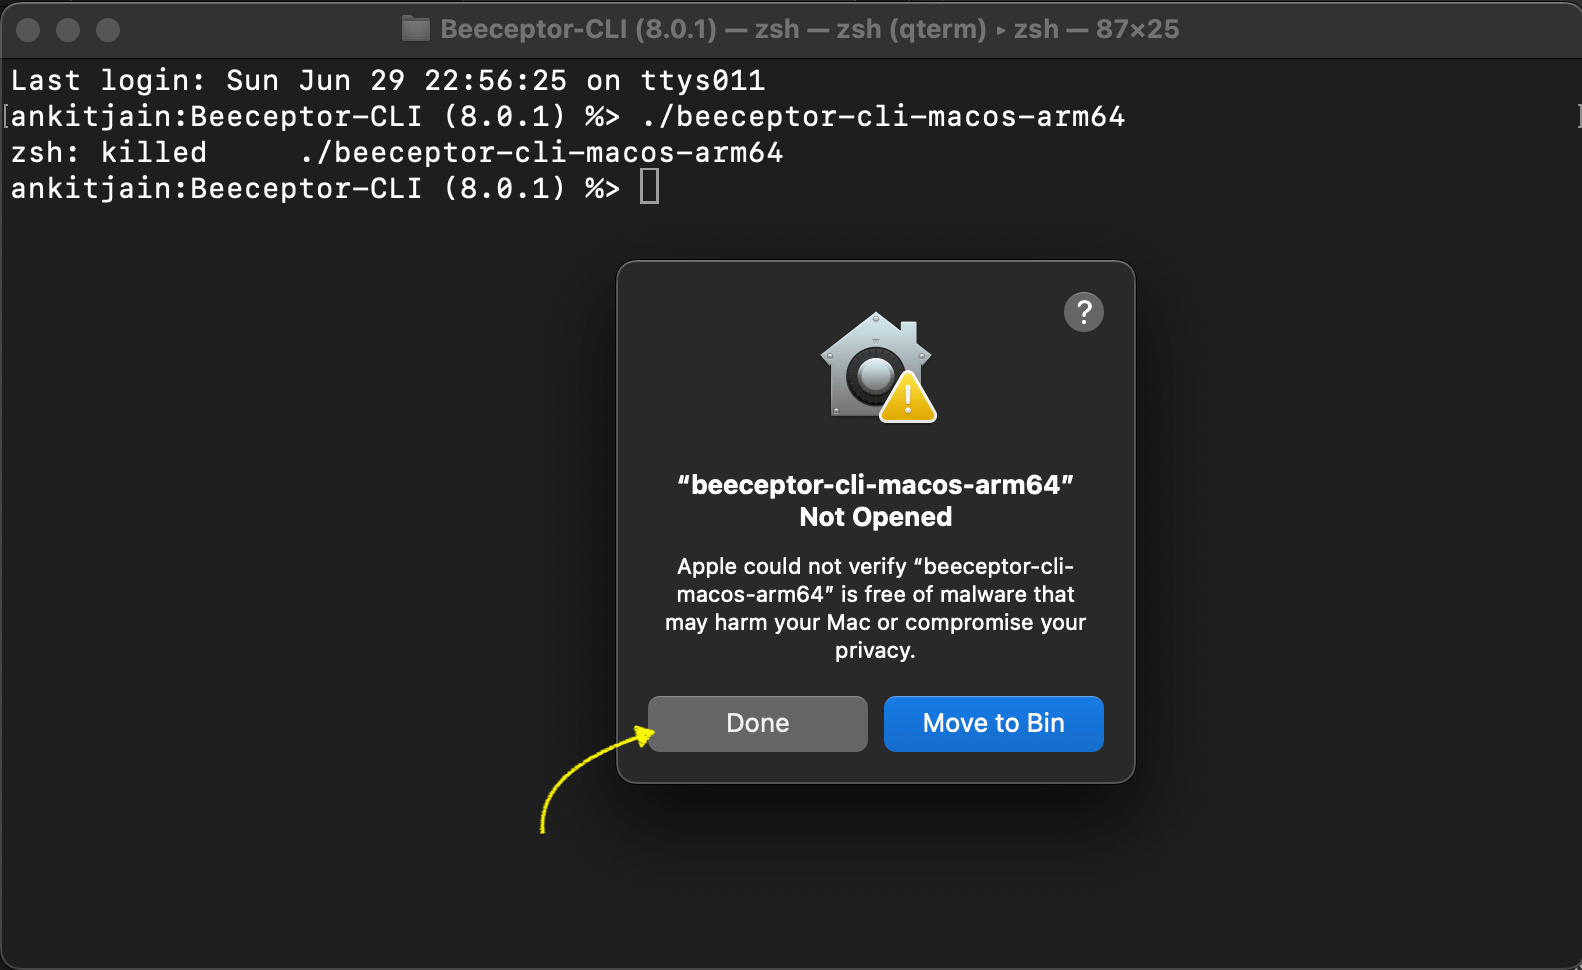
Click Done on this message to dismiss it for now.
We'll fix it in the next steps.:
- Open the Apple menu and select System Settings.
- Click on Privacy & Security in the sidebar.
- Scroll to the Security section on the right.
- If you see "beeceptor-cli-macos" was blocked, click Allow Anyway to allow it.
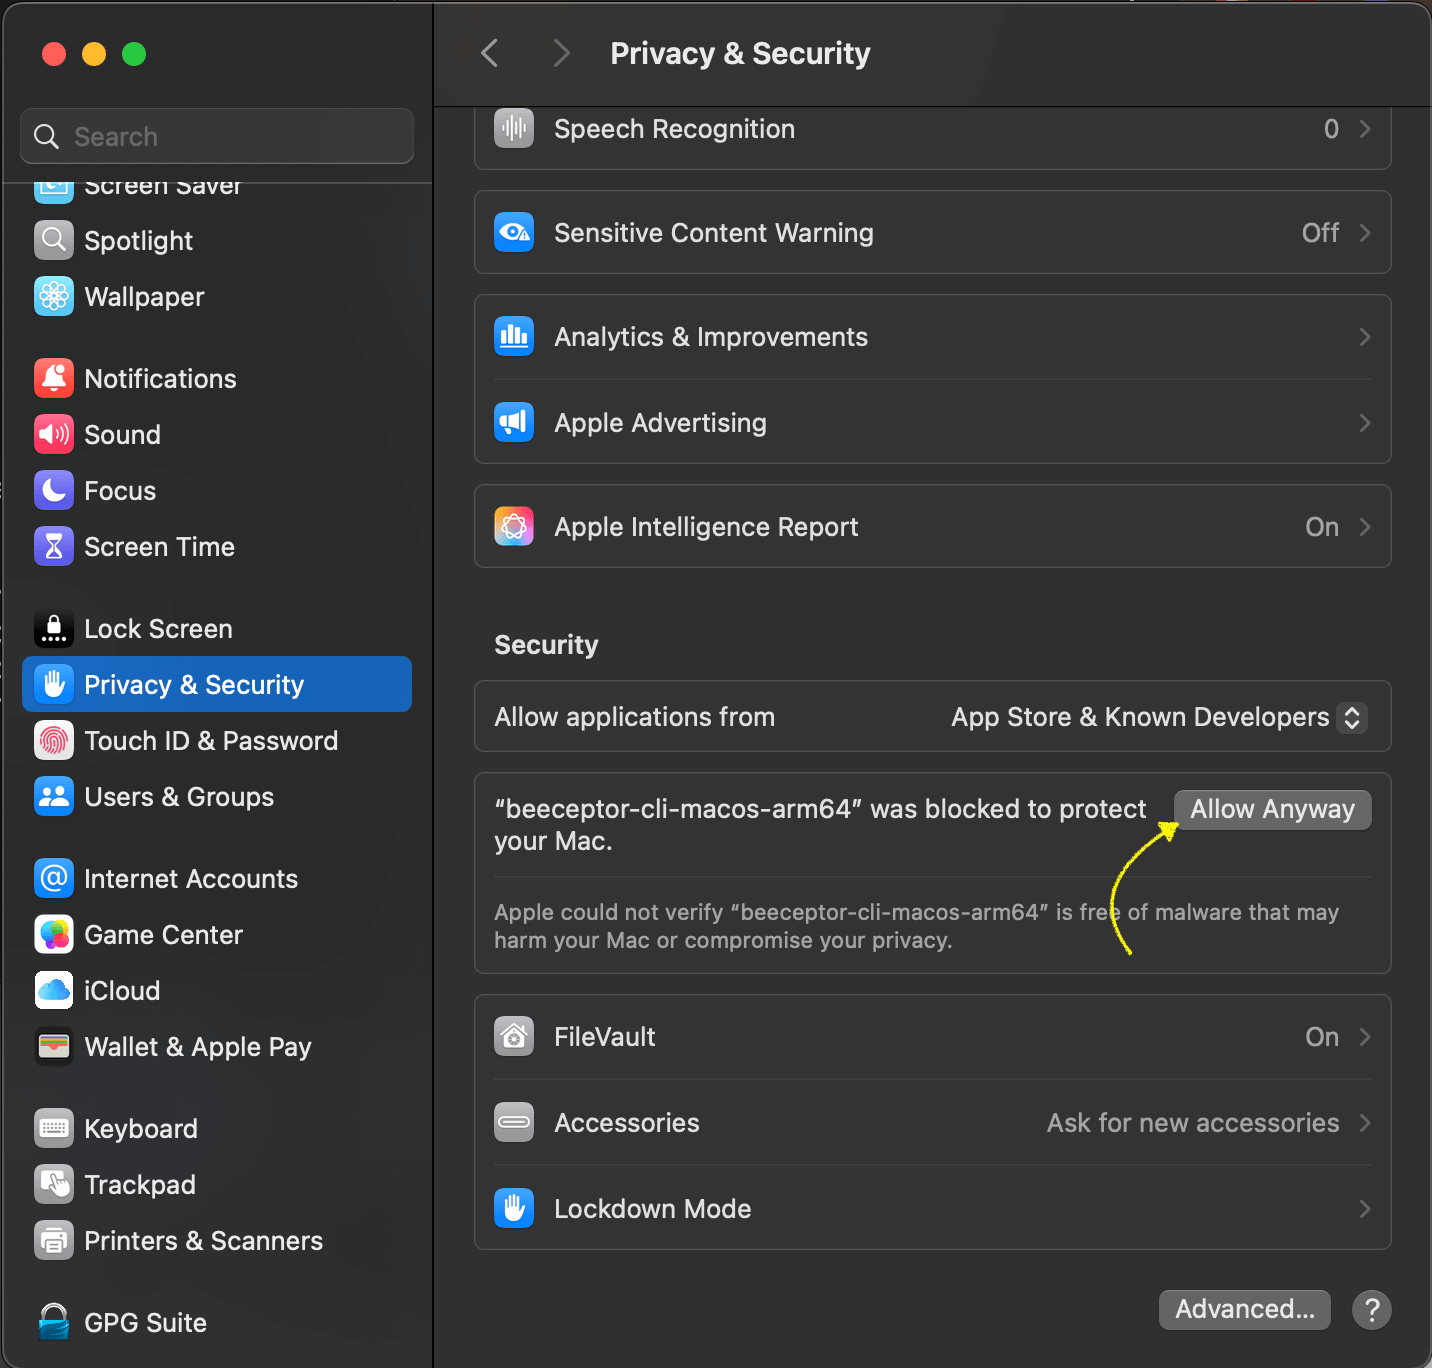
Allow Beeceptor CLI from the Privacy & Security settings. - Rerun the CLI
This is a one-time setup. You won't have to repeat these steps unless the app is updated or moved.
Note:
- macOS ARM64: This refers to Macs with Apple Silicon chips, like the M1, M2, M3, and M4, which are based on the ARM architecture.
- macOS x64 (or x86_64): This refers to Macs with Intel processors, which use the x64 architecture